UV lightbox cheap equivalents?

Dippy

Moderator
Don't know , you're the Prof :)
Nothing via Google?
Make something and try it.
Just as a guide, my proper UV box has 3 tubes and exposure time using clear laser sheet is < 2minutes .
Developing time using Seno (from Mega) is about 30 seconds at room temp.
(Fotoboard2 FR4).


David, I really don't know. It may be wonderful.
But I do know 3 things (that's all).
1. Nothing lasts forever.
2. By it's nature, an etchant has to be nasty.
3. There's no such thing as Magic.

I'm sure if it was the Great Solution then the Big Boys would use it to save time and running costs.
Maybe it's a disposal regulatory thing? I really can't guess.

Needless to say, you WILL be disposing of the exhausted chemicals in compliance with your local regulations won't you.....
Oh, what was that? I've just seen a flying pig :)

David, why not get a proper heater?
Why not ask Mega for a heater as a Service part? (For a Bubble Etcher)
It's better than a bodge which could fail badly.
My Bubble Etcher is 7 years old so I can vouch for Mega quality and reliability (well, strictly speaking, the quality 7 years ago!).
So, it may cost 5x more than a bodge but last 50 times longer...
Up to you.
 

eclectic

Moderator
I am also looking at making my own UV Exposure Unit.

I have just been able to get my hands on 6x 8W UV tubes.

I don't know if the UV light is in the right wavelengh.

The tubes are clear and read "Germicidal 8 Watt UV Lamp".

Can you tell if they are upto the job and how meny tubes I will need per side.

I have looked on maplin and megauk sites, and it seems that 2 or 3 tubes per side will do the job

I still have no way to connect or power the tubes yet.

I am in two minds, to buy two 16/24watt ballast units, or 4/6 high freq mini fluorescent lamp holders.
Not an answer, but a question.
Would it not be easier to buy the genuine article?

£129 for the box or £15 each for the tubes?
http://www.rapidonline.com/Tools-Fasteners-Production-Equipment/PCB-Equipment/Accessories/Ultraviolet-exposure-unit-with-timer/29468

It's your time and money.

Ec
 
Last edited:

alband

Senior Member
H'ok.

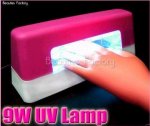
@Prof: I cannot advise you much on numbers of tubes and how to wire them up etc, but... This whole thread (first half at least) was about me trying to build a lightbox on the cheep. My eventual solution, which I still use, was a UV nail "curer" (I think). Link to an example

Don't ask me what it was originally intended for, because all I know; is that it has only one, small tube, and takes 1m10s for me. However, if your boards are big, it wont work. (Very cheep though :))

@eclectic: Some useful info on those, clearly epoxy isn't up to the temperatures, but that silicone gel looks perfect, thanks.

@Dippy: I thought so. Too good to be true. I'll stick to the ferric then and YES, I will be disposing of it sensibly ;) (seriously).
Why no buy a proper heater? Because I already have these little things, they use a nice 5V supply, they produce a lot of heat and I am currently etching OK without a heater, so they can't do any harm (not @ 5V at least) and may help the process. If not, nothing lost. Also given my rate of income, 3 weeks for a fiver is a sweet deal :D
 

Marcwolf

Senior Member
I have had great success using Kinsten boards and a small fluro 'Blacklight'

The bulb is a NELSON MELS208BLKBC 240v 20W unit. Cost about $8.00

Exposure time is 3 mins, and I use DIPTRACE to pring out positive images onto clear transpanencies on my laser.

I etch using Ferrous Chloride and the results are very good. As a hint - if your not going to be using the board straight away leave the remaining photo resist on. It can be easily removed using Acetone in a few wipes.

I can generally get out a board in about 20 mins. quailty is excellent with 0.25mm tracks no probs.

Hopes this helps
Dave
 
Last edited:

SD2100

New Member
I bought a Kalex UV light box 20 years ago so I don't need a new one yet, but I was interested if anyone has tried one of these UV nail dryers off fleabay for about $10.. Might be ok for doing small boards while your prettying your nails up :)..... I think the rubber hand is an optional extra ?
 

Attachments

SAborn

Senior Member
I fail to see all the importance in the fluffing around on buying the special junk to etch a board.
Save your money...i use a plastic lunch box for the ferric chloride and another for the caustic solution for the developer. For a heater a bucket of hot tap water.
I make boards on a weekly basis which is more than many of you will do in months.

Uv leds are cheap in clusters from Sureelectronics on fleabay and work a treat. No mains wiring or ballests needed.

The problem with people making circuit boards is it all gets to hard with the special junk they think they need.
This is far from what is actually needed to produce a good board on a small scale.
This thread alone has implied the need for lots of unesserary junk to produce a good board.

The most important part of making a PCB it to be able to have consistent exposure times and the rest dont really matter much after that.

The Uv coating on the etched circuit boards dont need to be removed and can be soldered through it easy, leaving the film remaining to protect the tracks if one desires.

Keep it simple and you will make a lot of good boards at a very cheap price.
 

SAborn

Senior Member
One final note is there appears to be a system that most try to etch the board clean except for the tracks and pads only remaining.

It is far better to use a fill plane after you design your board that fills in the unused area, and leaves a small gap around all the artwork.
This will make etching 10 times faster and extend the life of your etchant greatly.
I leave as much copper on the board as i can and only etch the small amount needed to make the board.

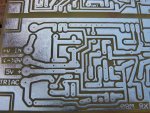
Here is some examples.
 

Attachments

Dippy

Moderator
Phil, someone here had a prolonged thead about using a Fleabay nail thingy.

Sadly, after a few very uneven photos posted it went very quiet.....
It looks like another Money Saving product bit the dust.

And then, for £100, you can buy something that works in 5 minutes, electricaly safe, UV interlock safe , nice even UV distribution and no need to muck about for weeks.

I've probably made more boards than SABorn and Westy put together and definitely agree that leaving as much copper on the board as possible is the best way.
(As long as it it's in the right places :) )

I too made my own stuff when I was a kiddy, but when I developed chest hairs I found that parting with £300 for UV Box and Bubble Etcher made life SO much easier. When you KNOW that your PCB comes out 100% then it brings a smile to your face.

Then , when you get older, (other than protos ad one-offs) you just farm the PCB work out to pukka firms - that makes life even easier :)
 

Lez T

Member
Dippy,
Must agree with you there, my first board out of 'proper equipment' did bring a major smile to my face and made me wonder why I had not bought the Etch Tank and UV Box years ago, Once you have found your 'settings' for exposure etc, everything in the future is far simpler. Having your first set of boards made by an outside source I found a little daunting as there is always the worry of did I get the drawings right, I did, and life is much easier now, board wise.
 

SAborn

Senior Member
Dippy, with all due respect i dont think we are Kiddys for making our stuff, and the fact you can justifie 300 quid for a exposure box, you would want to make more boards then the rest of us.

I am sure there is a lot of people here that would love to produce their own boards on a shoe string budget.

For less than a 1/4 of what you spent on your exposure box alone, i or anyone can set up every thing needed, including a sheet of 300x400m photo resist board and produce many boards of a good working quality.

The simple fact we are all here is because we enjoy building our own stuff, so why not build a system to expose PCB's, Its cheap and a fun project that you benifit from for many more projects to follow.

Making a board is so easy but drilling them i think is the harder part.
If the average person thinks drilling a board is not a problem than have a go at the etching as that is easy to.

It dont have to be a costly setup, but the better the setup the easier it gets.


Start off with the very basics and make a few boards and improve your technique as you go, then decide what you need to spend money on to suit you requirements, I think.

For many of you if it takes an hour to produce a board that Dippy or I could do in 15 minutes, do you really care as long as you have a workable board, and im sure it will still bring a smile on your face.
 

russbow

Senior Member
You are so right.

Making a board is so easy but drilling them i think is the harder part.
Many years ago I found that etching before drilling produced problems with pin spacing etc.

I very soon learnt that drilling, using a bit of veroboard as a jig was the answer, using a hobby drill in a vertical holder. I cant see how to overcome this. I bought 50 UV leds to go down the exposure line but decided no, gotta get the holes right. So, until somebody gives me a CNC type thingy, I shall carry on down the pre-drilled and magic DALO pen route. :eek:
 

Dippy

Moderator
I wasn't saying you are a "kiddy".
I am all for building stuff if time isn't important and/or educational and/or the wallet is limp.
No probs. I've done it myself.

I was saying when I was a kiddy i.e. young (ages ago) I took that route.
Buying UV tubes and starter, making a box, getting some glass, tin foil, building a timer... checking for even-ness.. I think it cost about £30 and took me a week.

Versus £100 and 5 minutes.
Reliability, safety, consistency. Ideal.
Chuck it in and walk away make some coffee.
Fire and Forget (almost).

Maybe it's because I didn't consider it as "fun".

So, if 'time is money' then consider buying rather than making.
And if it takes 20 boards before making a consistent UV exposure device then you may as well have bought a proper one in the first place.

I was trying to highlight that on-the-cheap self-build is NOT always a money-saver.
BUT it is completely understandable.
 

Dippy

Moderator
Nearly OK, but you can see the uneven-ness. Could end in tears with thin tracks over a larger area.

What make of board did you use?
I was shown some 'economy' anonymous board by a chum t'other day (sourced via Fleabay) where the copper looked like it had been applied with a hairy painting roller. Photo-etching a straight line was impossible.
 

SAborn

Senior Member
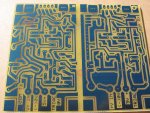
Alband, The larger of your 2 boards looks to be etched backwards? With all the pads and tracks etched away and the outer mask remaining.
Is this correct?
 

SAborn

Senior Member
Russbow,

When you use photo resist board and exspose the image onto it from printed artwork you also exspose a hole in the pad.

This makes drilling alignment easy as the etched hole acts like a centre punch mark and helps guide the bit to the correct location.

Its just the drilling process i loathed, to the point i built my own desktop CNC machine to not have to drill them any more...just wish i done it 15 years ago as it would be close to a million of those little holes i have drilled manually.

It is worth mounting a ultra bright led under a plastic plate shining upwards to place the pcb on for drilling. The light will shine through the board and the hole in the copper above will glow quite clearly.
This is what i used before the CNC.
 

Attachments

alband

Senior Member
Alband, The larger of your 2 boards looks to be etched backwards? With all the pads and tracks etched away and the outer mask remaining.
Is this correct?
Both of them are correct so I'm not sure which one you mean. Do you mean 31 or 65?
 

SAborn

Senior Member
Hi Alban,

It was the first one #31 that looked backwards.
The shiny bit in the photo is the copper right?
Or is this a double sided board and are we looking at the back side?
Confused?
 

alband

Senior Member
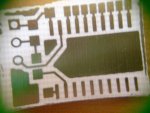
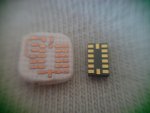
The brown stuff is copper on a white board. SMT 20x2 on the right. Download circuit (2x chip resistors) on the left with a 3pin header on the left (through-hole).
 
Top