unknown (to me) symbol of a component on schematics

rmeldo

Senior Member
A quick one.

with reference to the schematics in the link

http://ciseco.co.uk/forum/viewtopic.php?f=15&t=59

right below the phototransistor in the schematics there is a symbol which I don't recognise.

Could someone explain?

Also I have some BC182L and BC212L already. Could I use them instead of the BC548 as in the circuit? (Forgive me for this. I still don't know how to read transistor's datasheets)


Thanks and Merry Christmas

Riccardo
 
Last edited by a moderator:

Andrew Cowan

Senior Member
It looks like a high precision 10K potentiometer.

A usual 10K pot should be OK.

A

Too tired to look at transistor datasheets... :) Make sure the voltage is the same or higher, the current is the same or higher, and the gain is roughly the same. Oh, and make sure you replace PNP with PNP and NPN with NPN etc.

A
 
Last edited:

westaust55

Moderator
BCL182 vs BC548

Both are NPN

Vce for BC548 = 30V min
Vce for BCL182 = 50V min

Ic = 100mA for both types

Hfe (gain) is of the same order of magnitude


NOTE: Pin sequence differs.
BC548 is E-B-C
BC182L is E-C-B


So yes can use the BC182L in lieu of the BC548 but make sure you take into consideration the different pin layout
 
Last edited:

Dippy

Moderator
Just to prevent confusion as it looks like Westy has been on the Christmas Rum rations already :)

It is BC182L. Where L is a suffix denoting the modified pinout as much as anything.

If you have a PCB made and want the same pinout as the BC548 then knock off the L and use the BC182 or even BC183 or even BC184.
There are slight differences in the parameters as you will see if you check the Data Sheets side by side. (And you'll even see slight diffs for the 'same' device from diff Manufs).

But I would have thought for basic circuits like this the differences wouldn't make much difference. (Needless to say, I may regret saying that!!).

On many occasions (not this instance) in g.p. small signal circuits (and where the device isn't going to get stressed too much) the component choice is usually down to a case of :-
1. 'My favourite transistor' (i.e. the Devil you know).
2. What has been copied from other designs or from last year's college notes.
3. What is easiest to get hold of.
4. What is cheapest to get hold of.
5. And, for some (boo hiss), the first device near-enough-OK that I found on Ebay.

Of course, you will note that when the going gets tougher e.g. high frequency work, the component choice can be crucial. And sometimes, please sit down when I say this as it may come as a shock, you may have to BUY several components and actually TRY them.
Yes, it may cost at least 26 pennies. Perhaps you can get free samples from the Manufs?
 
Last edited:

westaust55

Moderator
D (hic) ippy,

Ooops, a minor case of Dish (hic) lexia. :p :eek:
Mebbe too much brandy in the Christmas Pudding :p


the BC182L is Emitter-Collector Base pinout per earlier email.


As you say, finding the right pin-out may be a necessity if a PCB already exists and pin layout is straight line.

If it is in triangular configuration, then I have before to day careful bent the base pin to suit :eek: with success for home experimental projects.


Christmas day is almost over here but for UK still 12 hours to go and in the US just starting. Have a great and easy day one and all.
 

Andrew Cowan

Senior Member
D (hic) ippy,

Ooops, a minor case of Dish (hic) lexia. :p :eek:
Mebbe too much brandy in the Christmas Pudding :p


the BC182L is Emitter-Collector Base pinout per earlier email.


As you say, finding the right pin-out may be a necessity if a PCB already exists and pin layout is straight line.

If it is in triangular configuration, then I have before to day careful bent the base pin to suit :eek: with success for home experimental projects.


Christmas day is almost over here but for UK still 12 hours to go and in the US just starting. Have a great and easy day one and all.
Just starting here. (UK).

A
 

rmeldo

Senior Member
Thanks guys.

Now that the inlaws have gone I have some time for relaxing.

I don't have any hardware yet and I am going to use stripboard.


I want to share the background of what I am trying to do as I keep changing my mind about the approach. People's comments are very useful.

I am trying to measure and log electric energy of a single appliance (a storage heater in this case). I went round the houses, trying to find a way to do it cheaply and safely.

I started thinking about modifying a plug-in energy meter (the ones you can buy on the high street) but when I opened it, it was too complicated and the mertering chip had no code on it, so no chance of diggiing out the datasheet. The safety of dealing with mains voltages also posed a saftey threat as well.

Then I though I could try and make my own using an Analog Devices purpose made chip. But it all gets too complicated and expensive for a one-off project.
(the PCB desing needs to take into account interferences, problems with common analog-digital ground, etc..)


My latest thinking is to do as was suggested in another thread: read the pulses off the meter with a phototransistor. I don't mean the meter from the energy supplier. I mean another which meters only the appliance. I found out that it is pretty easy to buy them for £10 on ebay. This to me seems a very safe approach, as the safety is taken care of, with al connections being well protected and the only connection with my datalogger will be optical (the phototransistor circuit).

The accuracy of the sub meter will be as good (or bad) as my main meter and the resolution (mormally 1 Wh per pulse) more than adequate.

The other good thing is that I can build and test the pulse detecting circuit separately while I wait for the meter to arrive.

I think the only downside will be the size of the whole contraption, as meters aren't small... but I can live with it.


Regarding reusing the transistors, I get a kick from recicling materials, regardless of their cost. It has been known of me keeping pieces of wood for five years and then finding the perfect use for them... as well as throwing something away years and then needing it the following week.

Merry Christmas to everyone.

Riccardo
 

Wrenow

Senior Member
D (hic) ippy,

Ooops, a minor case of Dish (hic) lexia. :p :eek:
Mebbe too much brandy in the Christmas Pudding :p


the BC182L is Emitter-Collector Base pinout per earlier email.


As you say, finding the right pin-out may be a necessity if a PCB already exists and pin layout is straight line.

If it is in triangular configuration, then I have before to day careful bent the base pin to suit :eek: with success for home experimental projects.


Christmas day is almost over here but for UK still 12 hours to go and in the US just starting. Have a great and easy day one and all.
Actually, I have done this (folded the leads to fit the board) with a nice, expensive, Sony Receiver/Amp that had a blown transistor, and the only source I had at the time was Radio Shack* same transistor with a different pin order. Isolated the fault the old-fashioned way - sprayed coolant on the circuit until the fault cleared, rinse and repeat in smaller and smaller areas areas until component is isolated, then replaced the failed component.

A month later, the other channel transistor blew, replaced it the same way. Lasted for years, with great sound, and no further failures until finally replaced.

*- This was pre-internet times. Only electronics tools I had were screwdrivers, soldering iron/heat sinks, and coolant. I don't even think I had a VOM at the time, but may have had an analog one.

I was awful proud of that repair. Thanks for stirring the memory.

Cheers,

Wreno
 

Dippy

Moderator
I applaud recycling and re-using.

However, the idea of recycling a 5p transistor which may, or may not, be damaged or partially damaged by maybe overheating it while tying to remove it from a PCB which may or may not have been working due to (sod's law) the transistor I have spent three hours removing is, in my very humble and inexperienced opinion, a waste of time - unless desparate of course.

I also use your 'hoarding' policy and have ended up with piles of stuff.
In fact I have more piles than a Hospital Haemorrhoid ward.

I think you were very wise to abandon the hacking.

It is not absolutely straight forward to design your own pcb around energy metering chips.
Yes, the Data Sheet pinouts look oh-so-easy don't they, but it requires very careful design of the power supply, careful input filtering, careful PCB design so it doesn't blow up and careful calibration. PCB design is crucial, as accuracy and stability are hugely important and you may be mixing big and little voltages as well as analogue and digital cicuitry.
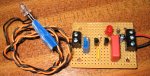
It is well beyond a 30 minute thrash with Eagle after getting it for Christmas.

My (limited) experience of the cheapie plug-ins has had mixed results.
I have one plugged into a PC + monitor right now. It claims to do all the PF stuff but says my 19" old CRT monitor is using 1 watt.
On the other hand it said my 25watt Weller soldering iron was using 24.5 watts. So a mixed bag of results.
But if you can't trust it then what's the point?
(I always think that 'trust' applies to all instrumentation, which is why I don't buy cheap 5 quid 'scopes and multimeters for pukka work.)

Unless you have 500 years experience, a shed-load of proper test-gear, a pile of knowledge and skill, I would, with the greatest Festive respect, suggest leaving energy metering stuff to the Big Boys who know what they're doing, or very experienced amateurs (who think they know what they're doing:) - especially those with 5 quid Ebay 'scopes)
 

eclectic

Moderator
Where, or what is the "high street?". Its also mentioned in the manual too.
JJ.
An old Brit expression.

A n. phr. A main road; esp. the principal shopping street of a town. oe.
B attrib. or as adj. Designed for, targeted at, or readily available to the general public. l20.

e
 

rmeldo

Senior Member
Dippy,

you certainly don't mince your words!

I must say I had come to the same conclusions regarding hacking into high street power meters, as well as to the real challenges in building my own meter (also somewhat out on a tangent from my project aim).


However you forgot to comment on the part I was most interested in, unless I misread your message. I think my latest solution is the most viable route. See below a link to a meter similar to the one I bought. This is a electricity board approved meter, not a gadget (I hope), complying with the UK regulations. In fact is the same model of the one the electricity board has installed and use for charging the energy consumption im my property.


http://cgi.ebay.co.uk/AMPY-SINGLE-PHASE-ELECTRIC-METER_W0QQitemZ290277213725QQcmdZViewItemQQptZUK_BOI_Electrical_Test_Measurement_Equipment_ET?hash=item290277213725&_trksid=p3286.c0.m14&_trkparms=72:1298|66:2|65:12|39:1|240:1318


This should come already calibrated, be free from interference, etc etc....
I hope that counting the pulses of the on-board red LED is something a "small boy" like me can tackleor at least try. As I said the resolution is quite good allowing me to go down to 4 Wh resolution if I log every 15 minutes.

The question is:

Apart from giving up trying to measure power consumption (not an option I want to contemplate until I have actually tried, put together hardware and failed more than once), does this route seem feasible? Have I missed any pitfal? Is the circuit as form message 1 above suitable for catching the pulses?

Thanks

Riccardo
 

Dippy

Moderator
Eh?
Those seem very similar (in principle) to the earlier links.

And I couldn't see any 'standards' asociated with them (e.g. UL or EN) either.

Yeah, those plug in ones are great.
Oh, how I enjoy getting down on my hands and knees to read the LCD.
What I save in power I can use to pay the Chiropractor ;)
 

boriz

Senior Member
The potentiometer in the first circuit is being used as a variable resistor. The diagram is incomplete and should show the wiper terminal connected to one end of the pot, so you can vary the resistance between zero and 10k. It makes no difference which end of the pot is connected to the wiper. This is probably to allow the circuit to be adjusted to a large range of possible source brightness conditions.

Pot’s are notorious for introducing noise and in this application I suggest replacing it with a fixed resistor once you have determined an appropriate value.
 

BeanieBots

Moderator
"It makes no difference which end of the pot is connected to the wiper"
"Pot’s are notorious for introducing noise "

Oh that DID make me laugh!

To avoid noise, connect the correct side to the wiper!

The reason POTs can introduce noise into circuits is because the wiper connection gets close to the spindle and hence the operator's hand when adjustments are made. Connecting the wiper to the low impedance side of the circuit helps reduce this. When a POT and resistor are in series, the POT should be fitted on the lower impedance side.
Also use the correct type of POT, no point fitting a carbon pot in a circuit which does not use carbon resistors for noise reasons.

The "correct side" issue actually came up as a question I was given at a technical competence interview very recently.

EDIT:
The little arrow points to the end which the wiper moves towards when turned CW.
 

Dippy

Moderator
I was given a really tricky question at a technical incontinence interview recently - I nearly wet myself.

Seriously though, thats a good point BB.
 

boriz

Senior Member
I defer to your greater knowledge. What you say makes good sense. But in this instance it makes little difference. The noise to which I was referring has nothing to do with spindles or hands. It’s the tiny area of contact between the wiper and the track, due to oxides, dust, vibration, heat expansion etc, becoming less and less accurate/reliable over time. A bit like the ‘crackly volume control’ syndrome. After all it IS a mechanical device.

Since all the amplification in the circuit is after this pot, it is the most noise-critical component. So I would tend to favour a simple low-nose precaution, like replacing the pot with a fixed resistor if practical to do so. That was my point.
 

BeanieBots

Moderator
A wasn't have a dig Boriz, it was more the timing and combination of statements that had me laughing so much.
Your commenst are absolutely valid and often overlooked. "Cheap" POTs can be notoriously unreliable. For a comparison on what I mean by cheap, have a browse for "servo POT". A 'real' one will cost in the region of £50 compared to a "volume control" costing around £0.20.
 

westaust55

Moderator
Riccardo,

Yes, It was a query. The word "What" does give that indication.


Dippy, Nothing to do with "Google mode".
I happen to know from my own past experience these two devices existed.

Altronics is an electronics store a few minutes from where I work (as is Jaycar and Dick Smith) which I frequently "haunt".

A work colleague had bought the kit based energy meter which is connected by leads so no need to crouch on the floor. Shortly after he bought the kit, they came along with the commercial pre-built plug in unit.

A friend's son was also looking for something similar only 2 weeks ago to measure the actual power from his Disk Jockey equipment and I put him onto the pre-built module.
 

rmeldo

Senior Member
Westaust

the first link in message #23 looks interesting. An since it is a kit (I presume with components list and schematics) I would probably be able to connect into it to extract a signal proportional to power usage to then log.

All the considerations about accuracy as from previous message in this thread still apply. The price however is the killer in this case.

I am not interested in the fact that these meters display the usage. I want to log from them, hence I am looking for a way to interface with whatever I buy.

The meter I bought for £8.50 is a board approved, reconditioned meter, hopefully accurate (we will see). And I have gone for optical reading, for safety reasons.

I had good fun building the circuit as for message #1 of this thread, in preparation for when the meter arrives. In the meantime it made for a great party piece this Christmas, copying the blinking pattern of the decorations.


The additional benefit for me is that the activity has taught me a lot and I am sure by the time I get everything working I will have learnt even more.

Next step is the interfacing with the Picaxe.


Here come the questions:

The meter will blink 1000 times per kWh. The peak power consumption, at night, could reach 12kW. that means 12000 blinks per hour, i.e. 3.33Hz or one every 0.3 seconds. This is beginning to be quite fast. I was thinking of using the blinking to cause interrupts and update a counter and check the time since the last log.

Can the Picaxe keep pace with this frequency (the interrupt needs to check the time and update the counter)?

Also:

The logging (of energy usage, as well as a bunch of temperatures, with thermocouples and DS18B20s) would take place every, say, 15 minutes. Measuring and storing the samples should take ~1-1.2 seconds.

If right before the temperature reading and logging starts I give a "count" command to the Picaxe, will I be able to do other things (i.e. temp reading and logging) while the counting takes place, so that I don't miss any of the blinks?

Thanks

Riccardo
 

Attachments

westaust55

Moderator
Logging energy consumption

The PICAXE chips achieve around 1 BASIC instructions per millisecond.
Beanie Bots did some actual measurements in the past: http://www.picaxeforum.co.uk/showthread.php?t=1128


So in 0.3 seconds you can perform something like 300 instructions on average.


Poking data to RAM in the SFR area is almost 10 times faster then writing to EEPROM.
i2c commands would I anticipate be some of the slower commands.
If you keep the incrementing counter in a PICAXE word variable all will certainly be well until the counter gets to 65535 which would take around 6 hours.


PICAXE BASIC can do one thing at a time in general.
While the PULSIN or COUNT comamnd are in use nothing else will happen.
 
Last edited:

rmeldo

Senior Member
Thanks.

So perhaps what I could do something like this:

when the logging routine starts:

1) deactivate the interrupt
2) use the count command to sample, say, 30 seconds of blinks.
3) increase the counter by the result of the count command
4) start the logging
5) reinitialise the counter, not from zero, but according to the results of the count command and the time elapsed since the interrupt was deactivated.
6) reactivate the interrupt

Comments?
 

westaust55

Moderator
Westaust

the first link in message #23 looks interesting. An since it is a kit (I presume with components list and schematics) I would probably be able to connect into it to extract a signal proportional to power usage to then log.
The schematic is available on the Silicon Chip website here:
http://www.siliconchip.com.au/cms/gallery/article.html?a=102045&i=10

If you search their website for "Appliance Energy Meter" and click on the first project pic on each of the two parts you see all the article diagrams
INCLUDING the WARNING labels
 

BeanieBots

Moderator
Glad to see just how much you have learned even on your short journey.
You can do quite a lot in 300mS as pointed out by westaust. However, you have a killer lurking in there.
The Readtemp command takes 750mS to execute. You will miss at least one of your 300mS pulses during a Readtemp.
You will need to use a 28X1 and the one-wire commands to get around that.
Alternatively, at the cost of a little resolution, you could feed the pulses into a digital divider before the PICAXE.
 

westaust55

Moderator
energy consumption monitoring

Thanks.

So perhaps what I could do something like this:

when the logging routine starts:

1) deactivate the interrupt
2) use the count command to sample, say, 30 seconds of blinks.
3) increase the counter by the result of the count command
4) start the logging
5) reinitialise the counter, not from zero, but according to the results of the count command and the time elapsed since the interrupt was deactivated.
6) reactivate the interrupt

Comments?

Do not believe that it will be possible to pre-load the variable used in the COUNT command with a value.

You will need to have a separate word variable to which you can add the new result from the 30sec count period after each pulse count period.

We really need to see a more complete program description (flow diagram) to understand what the interrupt is for and how it all ties togehter.
 

rmeldo

Senior Member
Westaust

yes,

there would be a separate variable for the counter driven by the interrupt.

I would initialise that according to the results of the count command.

I am going to put together some prototype software to try it out.

BeanieBots,

Readtemp would not do for me, since it is "pin consuming". I needed a 1-wire bus to have several DS18B20s so I went for the 40X1 and owin.

But I also have interfaced the DS2482 1-wire master with the Picaxe through the i2c bus (there is also a serial version instead of the i2c one), so I could still have the option to use smaller Picaxes, although the whole exercise is kind of useless, because the price difference between the 18X and 40X1 is so small. It was good fun anyway. At some point I will publish the code. I want to play with it more to see if any bug surfaces.


I probably will be able to initiate the temperature conversion and go back to monitoring the energy pulses without losing any pulse, while I wait for the 750 ms. The method described in my last message is a kind of short term extrapolator which could get me out of trouble, should everything else fail.


Riccardo
 
Top