Everyone's probably noticed by now that I think parallel LCDs are better than serial LCDs. The most common issues with serial LCDs are that they are slow and the serout command can cause conflicts with interrups, background hardware serial, i2c slave mode and the timer. Additional disadvantages include the extra power consumption of the additional microcontroller, the bulk added by the serial backpack and the potential for errors to happen if the oscillator in either microcontroller drifts too much.
Newbies are often scared off by the idea of using a parallel LCD or OLED particularly when reading in the HD44780 or WS0010 datasheet stuff about 4/8-bit mode and 'initialization sequences' plus there are a lot of pins to connect. There is no need to be scared - LCD serial controllers don't actually do much more than send whatever you send it over the serial connection to the parallel LCD using the parallel interface plus if you're worried about connecting to the PICAXE to the LCD incorrectly then you can use the AXE133 as this has a PICAXE-18M2 which you can reprogram on it. The PICAXE-18M2 on the AXE133 has some spare pins so you can use the AXE133 as an entire project board! See the AXE133 pdf for a circuit.
Hopefully this 'tutorial' will help users new to LCDs finish a project involving i2c slave mode/the timer/background hardware serial which they would have given up on had they continued to use a serial LCD, plus they will get to experience the additional benefits of the parallel LCD which include:
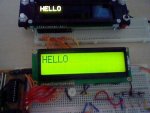
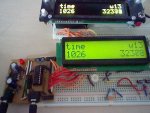
[HR][/HR]On a HD44780-compatible parallel LCD or Winstar OLED, when used in 8-bit mode, there is an 8-bit data bus, a register select (rs) pin, an enable pin and a read/write (r/w) pin. Since very few people need to read from the display we don't need the r/w pin so the LCD can be put in write mode by connecting this pin to 0V. That leaves 10 pins. The 8-bit data bus should ideally be connected to a single port and the other two pins can be connected to any other output pin. On the AXE133, the data bus is connected to pinsB, the rs pin to C.7 and the enable pin to C.6.
When the rs pin is low, the LCD is in instruction mode and when the rs pin is high, the LCD is in data mode. When the enable pin is pulsed, the LCD 'grabs' the data from the data bus and what it does with the data depends on whether the rs pin is high or low.
'Sending data to the LCD': This term will refer to putting the data or instruction on the data bus (e.g. by using let pinsB = x) and pulsing the enable pin.
Serial LCD users will be aware that to reposition the cursor you send 254 then the cursor position and to display text you simply send the text in the serout command. If you look at this part of the AXE133 code, you will see that when 254 is sent to the serial driver, the rs pin is made low (to put the LCD in instruction mode); the driver waits for another byte and this is 'sent to the LCD' (the second byte is put on pinsB unprocessed and enable is pulsed); finally the rs pin is made high again. When you send serial data to the driver without preceding it with 254, the rs pin is left high so the LCD is in data mode and the received bytes are sent unprocessed to the LCD.
So to summarize, on a parallel display to do the equivalent of sending 254,x you make rs low when sending the data to the display and to do the equivalent of simply sending x you make rs high when sending the data to the display. Got that? Make sure you've understood this before moving on.
[HR][/HR]Getting Started
You should define rs and enable as pin constants and lcddata as a name for pinsB at the very top of your program. You should also use the picaxe directive to state which PICAXE you are using:
Note: All this code here will be downloaded onto the AXE133 PICAXE, not whatever PICAXE you have connected to the AXE133 using the serial connection.
You also need to set all the data bus pins as outputs, as well as enable and rs:
One thing that a serial driver will do for you is to initialize the LCD (or OLED). When using the parallel display you have to do this yourself but this is a simple process. All you need to do is send a few instructions to the LCD. The instructions for initializing the display require a relatively long pulse (it's still quite short!) and I calculated the pulsout values in the code you'll soon see for a PICAXE running at 16Mhz based on the timings in the HD44780 datasheet. Don't forget that the PICAXE will automatically run at 16Mhz if you decide to use multitasking so it doesn't hurt to have the longer pulse lengths.
To initialize the display, you need to send four instructions to the display: Entry mode set; Display on/off control; Function Set; Clear Display. When testing, I found that it didn't matter which order this was done in but it's best to send the Clear Display instruction before the Display on/off control instruction because (in the case of the OLED) turning on the display before clearing it can cause random characters to be briefly displayed. The Winstar OLED datasheet suggests putting Entry Mode Set last so this is the order I will use (tested and working on both OLED and LCD): Function Set; Clear Display; Display on/off control; Entry mode set.
The Winstar OLED has the addition of font selection in the Function Set instruction and this is ignored by LCDs so you can choose to have any of the four founts available when using the OLED without it preventing a HD44780 LCD working if used instead of the OLED and all the code here will work on both OLEDs and LCDs. More details about the initialization instructions are available on page 24 of both the HD44780 and WS0010 datasheets.
Here is the code:
That's it - all the 'hard stuff' done. This should be all the code you have so far:
(continued...)
Newbies are often scared off by the idea of using a parallel LCD or OLED particularly when reading in the HD44780 or WS0010 datasheet stuff about 4/8-bit mode and 'initialization sequences' plus there are a lot of pins to connect. There is no need to be scared - LCD serial controllers don't actually do much more than send whatever you send it over the serial connection to the parallel LCD using the parallel interface plus if you're worried about connecting to the PICAXE to the LCD incorrectly then you can use the AXE133 as this has a PICAXE-18M2 which you can reprogram on it. The PICAXE-18M2 on the AXE133 has some spare pins so you can use the AXE133 as an entire project board! See the AXE133 pdf for a circuit.
Hopefully this 'tutorial' will help users new to LCDs finish a project involving i2c slave mode/the timer/background hardware serial which they would have given up on had they continued to use a serial LCD, plus they will get to experience the additional benefits of the parallel LCD which include:
- Lower cost - parallel LCDs are practically given away on eBay.
- More compact project - use of a parallel LCD eliminates the need for a bulky serial backpack or (if using the AXE133 as a project board) the need for an additional project board.
- Lower power consumption - serial displays use an additional microcontroller and this consumes power.
- The ability to read data from the LCD - AFAIK there is no serial LCD on the market that lets you do this but then again very few people actually need to do this! But it's still an advantage to have it if you want it.
- Faster - the parallel interface is faster than any serial display and this is particularly true for an LCD at 2400 baud. Most serial LCDs (including the AXE033) consist of a parallel LCD and microcontroller to convert the serial data to parallel so from that you can see that it is impossible for a serial LCD to be as fast as a parallel LCD. An example of how you can exploit this extra speed is to have a 'firmware update' screen where about twice a second the PICAXE writes the string 'Updating...' to the screen; issues the disconnect command; issues the reconnect command; writes the string 'Ready' or similar to the screen, and when no attempt is being made to program the PICAXE the screen will just say 'Ready' but as soon as the download is started it will change to 'Updating'.
[HR][/HR]On a HD44780-compatible parallel LCD or Winstar OLED, when used in 8-bit mode, there is an 8-bit data bus, a register select (rs) pin, an enable pin and a read/write (r/w) pin. Since very few people need to read from the display we don't need the r/w pin so the LCD can be put in write mode by connecting this pin to 0V. That leaves 10 pins. The 8-bit data bus should ideally be connected to a single port and the other two pins can be connected to any other output pin. On the AXE133, the data bus is connected to pinsB, the rs pin to C.7 and the enable pin to C.6.
When the rs pin is low, the LCD is in instruction mode and when the rs pin is high, the LCD is in data mode. When the enable pin is pulsed, the LCD 'grabs' the data from the data bus and what it does with the data depends on whether the rs pin is high or low.
'Sending data to the LCD': This term will refer to putting the data or instruction on the data bus (e.g. by using let pinsB = x) and pulsing the enable pin.
Serial LCD users will be aware that to reposition the cursor you send 254 then the cursor position and to display text you simply send the text in the serout command. If you look at this part of the AXE133 code, you will see that when 254 is sent to the serial driver, the rs pin is made low (to put the LCD in instruction mode); the driver waits for another byte and this is 'sent to the LCD' (the second byte is put on pinsB unprocessed and enable is pulsed); finally the rs pin is made high again. When you send serial data to the driver without preceding it with 254, the rs pin is left high so the LCD is in data mode and the received bytes are sent unprocessed to the LCD.
Code:
main:

	serin RX,baud,b1			; wait for the next byte

	; NB keep character mode test as first item in this list to optimise speed
	if b1 < 253 then
		let pinsB = b1 		; output the data
		pulsout enable,1  	; pulse the enable pin to send data.
		goto main			; quickly loop back to top
	else if b1 = 254 then
		low rs 	     		; change to command mode for next character
		serin RX,baud,b1		; wait for the command byte
		let pinsB = b1 		; output the data
		pulsout enable,1  	; pulse the enable pin to send data.
		high rs			; back to character mode
		goto main			; quickly loop back to top
	else if b1 = 253 then
		serin RX,baud,b1		; wait for the next byte
		gosub msg			; do the 16 character message
		goto main			; back to top
	else ; must be 255
		serin RX,baud,b1		; wait for the next byte
		let pinsC = b1 & %00000111 | %10000000
						; output the data on C.0 to C.1, keep RS high
		goto main			; back to top
end if[HR][/HR]Getting Started
You should define rs and enable as pin constants and lcddata as a name for pinsB at the very top of your program. You should also use the picaxe directive to state which PICAXE you are using:
Code:
#picaxe 18m2
symbol lcddata = pinsB
symbol rs = C.7
symbol enable = C.6You also need to set all the data bus pins as outputs, as well as enable and rs:
Code:
start:
	dirsB = 255											'Set pinsB as outputs
	low rs											'instruction mode
output enable 'set enable pin as outputTo initialize the display, you need to send four instructions to the display: Entry mode set; Display on/off control; Function Set; Clear Display. When testing, I found that it didn't matter which order this was done in but it's best to send the Clear Display instruction before the Display on/off control instruction because (in the case of the OLED) turning on the display before clearing it can cause random characters to be briefly displayed. The Winstar OLED datasheet suggests putting Entry Mode Set last so this is the order I will use (tested and working on both OLED and LCD): Function Set; Clear Display; Display on/off control; Entry mode set.
The Winstar OLED has the addition of font selection in the Function Set instruction and this is ignored by LCDs so you can choose to have any of the four founts available when using the OLED without it preventing a HD44780 LCD working if used instead of the OLED and all the code here will work on both OLEDs and LCDs. More details about the initialization instructions are available on page 24 of both the HD44780 and WS0010 datasheets.
Here is the code:
Code:
	lcddata = %00111011 : pulsout enable,16			'Function Set: 8-bit, 2 lines, font 11
	lcddata = %00000001 : pulsout enable,608			'Clear display
	lcddata = %00001100 : pulsout enable,608			'Display on/off control: Display on, cursor off, blink off
	lcddata = %00000110 : pulsout enable,16			'Entry mode set: Increment, cursor shift
Code:
#picaxe 18m2
symbol lcddata = pinsB
symbol rs = C.7
symbol enable = C.6

start:
	dirsB = 255								'Set pinsB as outputs
	low rs								'instruction mode
	output enable							'set enable pin as output

	lcddata = %00111011 : pulsout enable,16			'Function Set: 8-bit, 2 lines, font 11
	lcddata = %00000001 : pulsout enable,608			'Clear display
	lcddata = %00001100 : pulsout enable,608			'Display on/off control: Display on, cursor off, blink off
	lcddata = %00000110 : pulsout enable,16			'Entry mode set: Increment, cursor shift